How to hang a Power Strip without nails or screws?
Power strips are generally used in homes and offices. You find power strips lying on the floor, under a table, on a desk, any many such places. In this blog we discuss how you can hang a power strip on a wall or on your desk. Hanging a power strip on a wall at a convenient place makes your workplace safe and organized.
The increasing need for electrical equipment in homes, schools, hotels, offices and other workplaces has resulted in a need for more electrical receptacles. As a result, the demand for power strips has been increasing rapidly during the last decade. As per a market study, the demand for power strips has doubled between 2014 and 2018. The emergence of USB power strips and smart power strips have promoted the development of power strips to the direction of smart applications, bringing higher utility for the users.
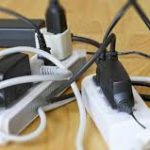
Safety in using power strips
Poor installation of power strips can be hazardous
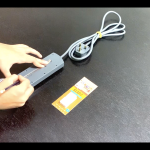
It is safe to neatly hang power strips on the walls close to your workplace or the electric appliances that it is being used for. It is also important to remove and safely store a power strip when it is not being used. KLAPiT provides an easy solution to hang a power strip on your wall without using nails or screws. You can remove your power strip anytime and reinstall it when you need it again. You can also watch a video on “how to hang a power strip without Nails or Screws”.
Hanging a Power Strip
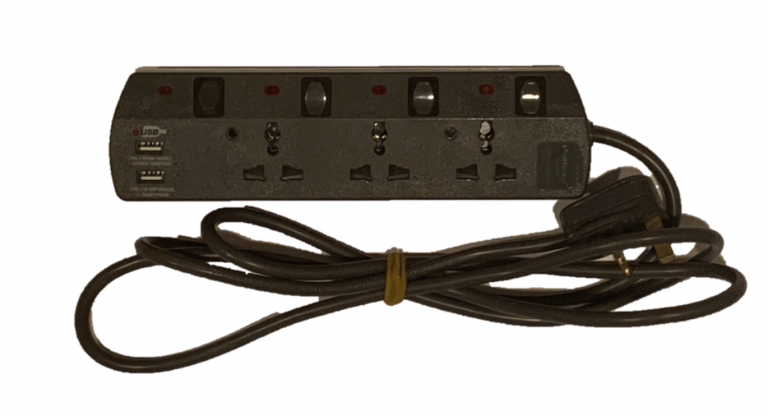
STEP 1 Selecting the right power strip
Often people don’t pay too much attention to this. Buying a good quality power strip will keep your home or workplace safe. You also need to determine how many plug points do you need to support your appliances in a particular place. In UAE you can buy brands such as Philips, Oshtraco and Belkin, etc.
Nachi recommends the length of the wire to be between 1.5 feet to 25 feet. The correct length of the wire should measured so it is neither stretched nor the wire is wound or knotted.
Select a few options on the wall where the power strip should be fixed.
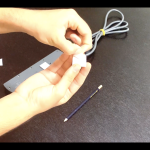
STEP 2 Open the pack of KLAPiT
KLAPiT AssemblyOpen the 2pc Pack of KLAPiT
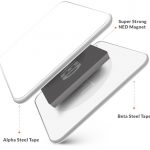
You will find inside 2 pairs of KLAPiT. Each Pair contains
Alpha Steel Tape (White Steel tape with an adhesive covered by a liner on one side)
Beta Steel Tape (Same as Alpha Steel Tape)
NED Magnet
STEP 3 Mark where to install the steel tapes
Mark the Power StripMark the rear of the power strip
Using a measuring tape, find the center on the right edge of the power strip. Don’t mark the point on a hole or an uneven surface. Mark a point 1.3 cm to left of the right edge and call it “R”.
Mark a point 1.3 cm to the right of the center of the left edge of the power strip and call it “L”.
Similarly mark a point 1.3 cm to the left of the center of the other edge and call it “B”
Mark the Wall
Holds the power strip against the wall, and place marks corresponding to the “L” and “R” points on the power strips.
STEP 4 Install the two Beta Steel Tapes on the power strip
Attach Beta steel tape to the power stripPlace the power strip on a hard surface with its back facing you.
Remove the liner from the first Beta Steel Tape and place it on the power strip so that the left of the Beta Steel Tape touches the “L” mark on the left edge of the power strip.
Remove the liner from the second Beta Steel Tape and place it on the power strip so that the right of the Beta Steel Tape touches the “R” mark on the right edge of the power strip.
Press both the steel tapes firmly against the frame. The harder you press, the stronger will be the bond between the power strip and the steel tapes.
Leave the power strip for at least 60 minutes for the adhesive bond to strengthen.
STEP 5 Install Alpha Steel Tape on the wall
Remove the liner from the first Alpha Steel Tape and place it on the wall so that the left Alpha Steel Tape touches the “L” mark on the wall.
Remove the liner from the second Alpha Steel Tape and place it on the wall so that the left Alpha Steel Tape touches the “R” mark on the wall.
Press both the steel tapes firmly against the wall. The harder you press, the stronger will be the bond between the wall and the steel tapes.
Leave the steel tapes on the wall for at least 30 minutes for the adhesive bond to strengthen.
STEP 6 Install the power strip on the wall
Attach the NED Magnet to the Beta Steel Tape.
Pick the power strip and attach it to the wall so that the NED magnet is between the two steel tapes.
You can adjust the power strip by moving it clockwise or anticlockwise without pulling.
Removing the power strip
KLAPiT has been developed keeping in mind that you should be able to remove and reinstall your power strip at any time. The power strip is held against the wall using a strong magnetic force and a very strong VHB adhesive. To remove the power strip, slide it down, up, or on either of the two sides. Remember not to pull the power strip or else it may damage either the surface of the wall or that of the power strip.
After you remove your power strip, you can use NED Magnet with another product in the same place. You can also attach the NED Magnet to the power strip and hang it on another wall that has an Alpha Steel Tape.
Caution: Install Steel tapes only on the flat and hard surfaces on the power strip and the wall. If there are any pins, paper or existing screws on the power cord, please remove them before installing the steel tapes. Also, please do not install the steel tapes on the existing holes. The steel tape needs strong surface to bond with. For further details please refer to our blog on common errors while installing KLAPiT.
Frequently Asked Questions (FAQs)
Q. My power cord has a steel frame that can directly attach to the NED magnet. Do I still have to use beta steel tape on the steel frame?
A. Usually, the metal frames are coated with normal paints to give them a smooth finish. These paints have weak friction causing the magnet to slide on the metal surface. In KLAPiT we use special coating material on the steel tapes that enhances friction and stops the NED magnet to slide freely. Therefore, we recommend that you should fix the beta steel tape on the power strip, even if it is made of steel.
Q. Will the Magnetic field of the NED magnet interfere with the current in the power cord?
A. The Magnetic field is strong enough to hold the two steel tapes together. The thickness of the adhesive between the steel tape and the power cord is enough to significantly reduce the magnetic field strength. Hence, the magnetic field will not have any effect on either the metal components used or the current passing through the power strip.
Q. How many KLAPiTs should be used for hanging a power strip?
A. Power Strips are usually not very heavy. You will need a minimum of 2 KLAPiTs to hang a power strip. However, the number of power plugs attached and the amount of wire suspended will also determine the amount of force exerted on the power strip. For example, if the power strip is placed at a height of 5 ft from the floor, will have to support a much larger weight of the wires compared to a power strip that is placed at a height of 1 ft from the floor. Similarly, the weight of 4 plugs with wires will be much higher compared to the weight of 1 plug. In order to strengthen the power strip, you can add 2 more KLAPiTs, one each on the top and the bottom edge of the power strip.
The product makes me so happy! It is so easy to use, no unnecessary drilling required and geez, the NED magnet is strong!!!
Clap for #KLAPiT. No mess, No Fuss, No BlackHoles in White Walls
Modern solution Very useful every where homes schools supermarkets home furnishings exhibitions trade shows retail outlets etc
Fantastic product. Very innovative. Lovely klaping noise. 10/10. Too easy.
Wow what a product go drill free
Damage free to walls and reliable, unlike tapes or velcro Love this product!
Nice concept. Would suggest everyone to try it.
No more holes on the wall. No screws, no drilling the walls, no hammering nails, no hiring expensive external resources......Just KLAPiT.
Your solution to all wall fixtures.
The magnets blend into the wall like they're not there. Excellent.
It’s a really good product, didn’t need to drill holes in my walls to hang my painting and also had the option to switch even after hanging it ! Really good product, must buy.