How to hang a large picture without damaging walls?

How to Hang a Large Painting without damaging walls?
                                                              Large Painting 2Kg ; Dimensions: 80cm X 80cm

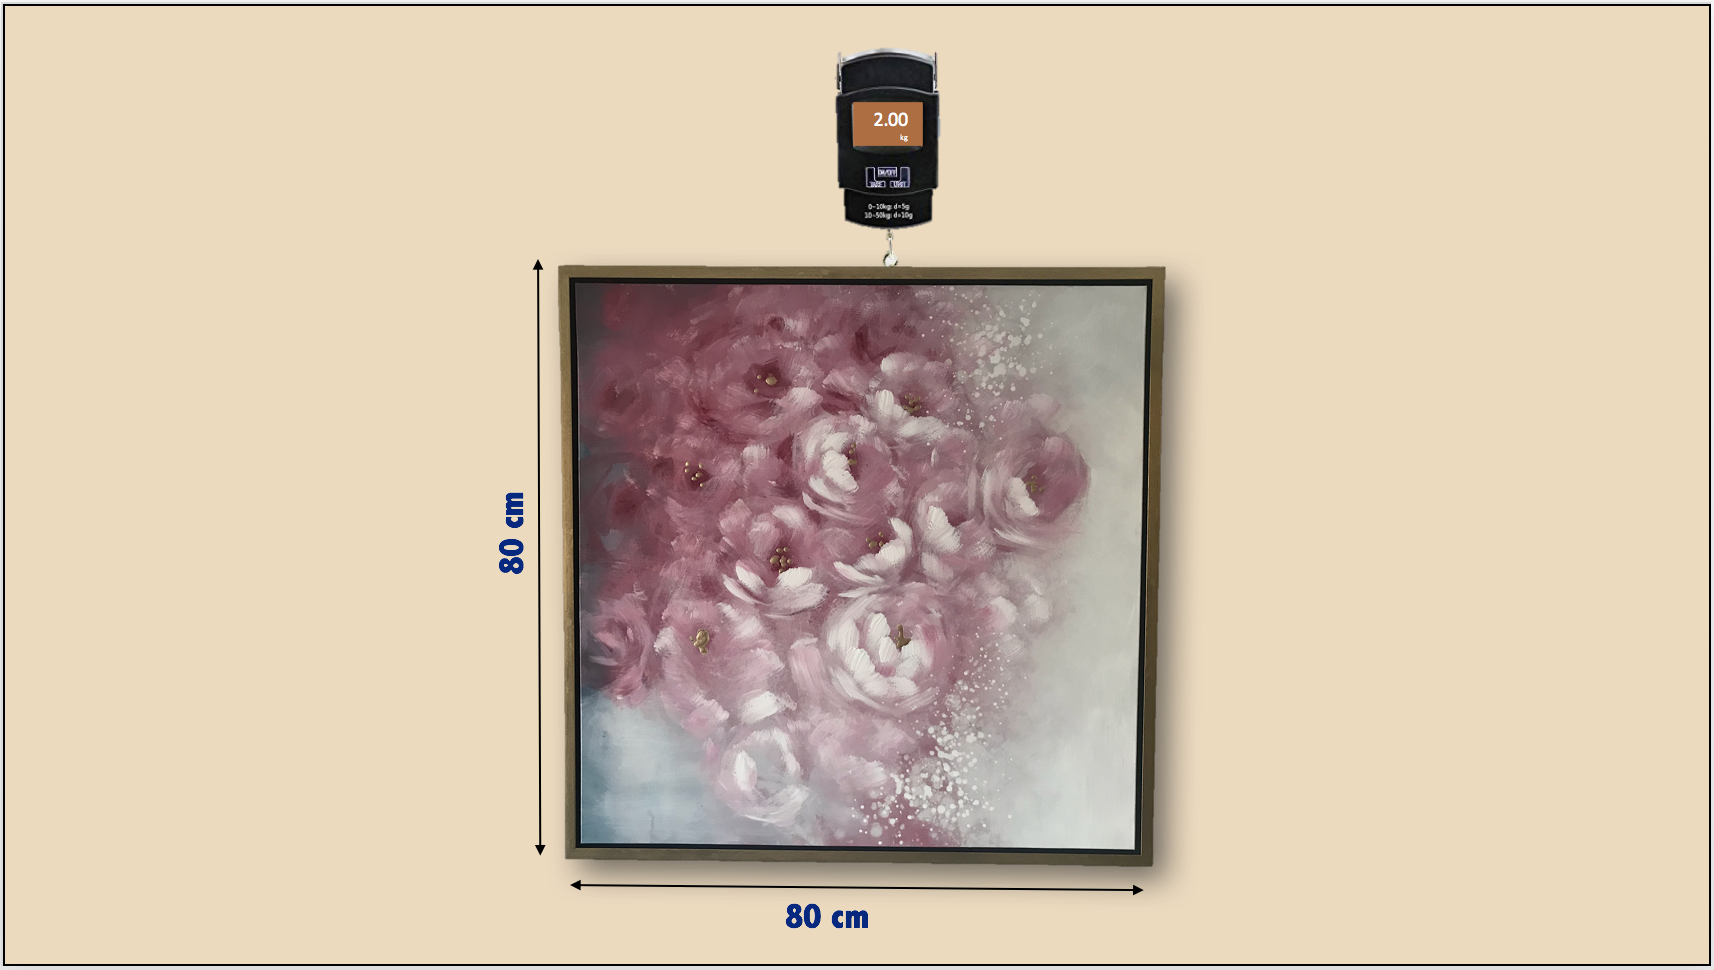
Do you want to hang a large picture without damaging walls and without calling labor or a handyman? You can now hang large pictures weighing 2 Kg and more without damaging your walls. And you can do it all by yourself, without calling labor for extra help. This blog will guide you through the step-by-step procedure of hanging a large picture frame without using a drill and damaging the wall. You can watch the video demonstration of the drill-free hanging of the painting. The painting used in the video measures 80 cm X 80 cm (2.6 feet Xx 2.6 feet) and weighs 2 Kg.

Materials Required to perfectly hang a large picture

Materials required to hang a large painting without using nails or screw
Materials required
  1. 4 pcs of KLAPiT – You can buy these at AmazonAce, Carrefour, or noon in UAE and at Amazon in Canada and UK.
  2. A Pencil and an eraser to mark the places where you will hang the painting and install KLAPiT.
  3. Measuring tape
  4. Leveler to check if the picture is straight.

STEP 1 Decide where to place your picture frame

  1. Select a few options on the wall where the painting can be fixed.
  2. Hold the painting against the wall. It is worth spending some time on this. You should consider the placement of furnishings in the room, lighting, color match, and visibility from different parts of the room.
  3. If you have a friend or a family member around, ask them to watch it from a distance while you hold the painting. They can guide you about the symmetry of the picture against the wall’s structure and placement of other objects such as pictures, shelves, curtains, furniture, etc.
  4. Hold the picture against the wall in the desired place and make minor marks on the wall using a pencil at the four corners of the painting. Then go back and visualize the picture there to estimate the symmetry against the wall and other objects.
  5. You can erase the pencil marks after or immediately before you fix each of the Alpha steel tapes.

STEP 2 Open the 2 packs of KLAPiT

  1. Tear open each of the 2pc-Packs of KLAPiT
  2. In each pack, you will find 2 pairs of KLAPiT. Each Pair contains
    1. 1 Alpha Steel Tape (White Steel tape with an adhesive covered by a liner on one side)
    2. 1 Beta Steel Tape (Same as Alpha Steel Tape) and;
    3. A NED Magnet
  3. Therefore, from the 2 packs of KLAPiT, you will get
    1. Alpha steel tapes – 4 pcs
    2. Beta steel tapes – 4 pcs
    3. Super strong NED magnet – 4 pcs
  4. KLAPiT is an assembly of 2 steel tapes using 3M VHB adhesive and a super strong NED magnet
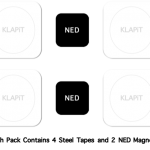
    Contents in each pack of KLAPiT

STEP 3 Install Beta steel tapes on the picture frame

1. Mark the frame of the picture

    1. Turn the picture and identify the hard surface where you can install the Beta steel tape. This will generally be the frame of the picture.
    2. Check on the corner of the painting if there are any pins or holes.
    3. Find a 1 sq inch space on each painting corner that does not have any pin or a hole.
    4. Measure its distance from the edge of the frame and record it for its later use while fixing the Alpha steel Tape.
    5. You can use nomenclature such as “TL” for the Top Left corner of the painting and “”TR” for the Top Right Corner of the picture, and so on. You can also use numbers such as 1 for Top Left and 2,3, and 4 for top right, bottom left, and bottom right.

2. Mark the frame of the picture

    1. Place the Picture frame on a hard surface with its back facing you.
    2. Remove the liner from the first Beta Steel Tape and place it on the frame so that the left of the Beta Steel Tape touches the “TL” mark on the top-left corner edge of the frame.
    3. Remove the liner from the second Beta Steel Tape and place it on the frame so that the left of the Beta Steel Tape touches the “TR” mark on the top-right edge of the frame.
    4. Press both the steel tapes firmly against the frame. The greater the pressure, the stronger will be the bond between the frame and the steel tapes.
    5. Now your 2 beta steel tapes are installed at the top edge of the frame.
    6. Use similar steps to install two beta steel tapes on the bottom of the frame at the places marked “BL” and “BR.”
    7. Leave the painting for at least 30 minutes before hanging for the adhesive bond to strengthen.

STEP 4 Install Alpha steel tapes on the wall

  1. Measure the Beta steel tape distance fixed at the point “TL” from the left edge of the painting.
  2. On the wall, measure an equivalent distance from the top left painting mark created in step 1.
  3. Remove the liner of the Alpha steel tape and attach it to the wall so that the left edge of Alpha steel tape touches the “TL” mark.
  4. Remember that the distance of Alpha steel tape from the left and the top edges (on the wall) must be the same as you have from the respective edges on the frame.
  5. Use the same procedure to install the other 3 Alpha steel tapes at the points “TR,” “BL,” and “BR.”
  6. Press each of these steel tapes using your palm, so these are firmly installed on the wall. The harder you press, the stronger will be the bond between the steel tape and the wall.
  7. Leave the Alpha steel tapes on the wall for at least 30 minutes for the adhesive to strengthen.

Note

The center of the Alpha steel tape on the wall should precisely align to the center of the Beta steel tape on the wall to perfectly hang a large painting. However, even with slight deviance from this perfect alignment, the NED magnet will be able to hold your picture firmly against the wall. This feature of KLAPiT distinguishes it from other solutions such as Velcro Tapes, in which the two strips have to be perfectly aligned whenever you hang your product.

STEP 5 Hang the large Picture on the wall

  1. Attach the 4 NED Magnets to each of the Beta steel tapes on the painting.
  2. Hang the picture on the wall so that each NED magnet is between corresponding Alpha and Beta steel tapes.
  3.  

Removing the picture

The painting is held against the wall using a strong magnetic force and a powerful VHB adhesive. To remove the picture, slide it down, up, or on either of the two sides. Remember not to pull the painting, or else it may damage either the wall’s surface or the picture.

After you remove your painting, you can use NED Magnet with another product in the same place. You can also attach the NED Magnet to the wall decor and hang it on another wall with Alpha Steel Tape.

How to hang even a larger picture of more than 2 Kg without drilling or damaging the walls?

To hang frames that weigh between 1Kg and 2Kg, add four Beta steel tapes to the four corners of the frame. Then, add 2 beta steel tapes for every 1 Kg of weight on the edges of the frame. For example, if the picture frame weighs between 2Kg and 3Kg, you should install the two additional beta steel tapes – one at the center of the top edge and the other at the center of the bottom edge. If your frame weighs between 3Kg and 4Kg, install two more steel tapes in the middle of side edges and so on.

Caution: Please install Steel tapes only on the flat and hard surfaces on the product and the wall. If there are any pins, paper, or existing screws on the product, please remove them before installing the steel tapes. Also, please do not install the steel tapes on the existing holes. The steel tape needs a solid surface to bond with. For further details, please refer to our blog on common errors while installing KLAPiT.

Shop for KLAPiT in your country

Shop for KLAPiT Picture Hanging Strips in United Arab Emirates (UAE)
United Arab Emirates
Shop for KLAPiT Picture Hanging strips in Canada, KLAPiT Online, Picture hanging strips, Canada, Picture Hanging Hooks, Picture strips
Canada
Shop for KLAPiT Picture Hanging Strips in United Kingdom, UK,
United Kingdom
Share on facebook
Facebook
Share on google
Google+
Share on twitter
Twitter
Share on linkedin
LinkedIn

Design your home with our collection of DIY Projects