- Use a pencil to mark places for steel tape on the Picture Frame
- Using a measuring tape, find the center of the Picture.
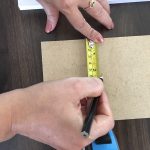
Find the center of the picture frame - Mark a point 1.3 cm to the left of the center and call it “L”.
- Mark a point 1.3 cm above the center and call it “T”
- Using a measuring tape, find the center of the Picture.
- Use a pencil to mark places for steel tape on the Wall
- Place the picture between the left edge and the top edge marks on the wall, placed in STEP 1 above.
- Make marks similar to “L” and “T” marks created on the picture frame
Tear open the 2pc pack of KLAPiT
You will find inside 2 pairs of KLAPiT. Each pair contains:
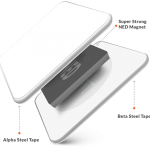
- 1 Alpha Steel Tape (White Steel tape with an adhesive covered by a liner on one side)
- 1 Beta Steel Tape (Same as Alpha Steel Tape)
- A NED Magnet
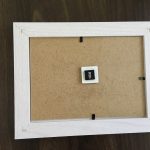
- Clean the surface of the picture frame near the “L” and “T” marks.

Clean the surface - Remove the liner from the Beta Steel Tape and place it on the picture frame so that the left and the top of the Beta Steel Tape touches the “L” and the “T” marks on the picture frame.
- Place the picture frame on a hard surface with its back facing you.
- Press the steel tape firmly against the picture frame. The greater the pressure, the stronger will be the bond between the frame and the steel tape.
- Leave the picture frame for at least 30 minutes for the adhesive bond to strengthen.
- Clean the surface of the wall near the “L” and “T” marks.

Remove the liner from the steel tape - Remove the liner from the Alpha Steel Tape and place it on the wall so that the left and the top of the Alpha Steel Tape touches the “L” and the “T” marks on the wall.
- Press the steel tape firmly against the wall. The greater the pressure, the stronger will be the bond between the frame and the steel tape.
- Leave the steel tape on the wall for at least 30 minutes for the adhesive bond to strengthen.
- Attach the NED Magnet to the Beta Steel Tape.
Attach NED Magnet to the product - Pick the picture frame and attach the picture frame to the wall so that the Ned magnet is between the two steel tapes.
- You can adjust the frame straight by moving it clockwise or anticlockwise without pulling.
Hang picture on the wall


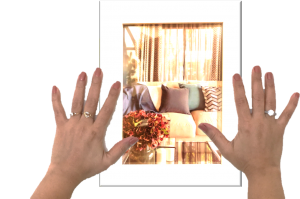
The product makes me so happy! It is so easy to use, no unnecessary drilling required and geez, the NED magnet is strong!!!
Clap for #KLAPiT. No mess, No Fuss, No BlackHoles in White Walls

Wow what a product go drill free
It’s a really good product, didn’t need to drill holes in my walls to hang my painting and also had the option to switch even after hanging it ! Really good product, must buy.
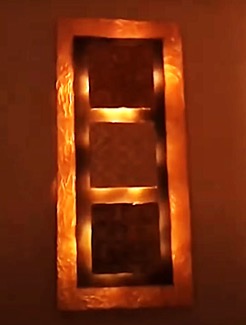
DIY
DIY – City Lights Wall Decor
Create this beautiful City Lights Wall Decor at home for your bedroom. Moreover, you can
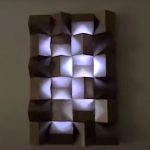
DIY
DIY – Backlit 3D Wall Decor
Create this beautiful backlit 3D Wall Decor at home for your bedroom. Moreover, you can
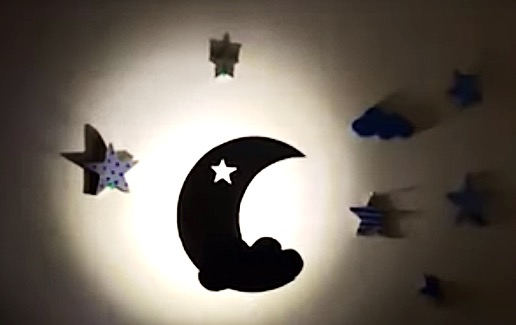
DIY
DIY – Moon and Stars Decor
Create this beautiful backlit Moon and Stars decor at home for your kids room. Moreover,